I graduated from the program some time ago!! 🎉🎉! I decided to dedicate some time to deploy my React project! There are many ways to do this, but I decided to go with the one I felt more comfortable: deploying the backend with Heroku, and the frontend with Surge.
Note: I created two separte Github repositories: one for the backend, and one for the frontend!
Deploying the backend with Heroku
Deploying my backend with Heroku went smooth! Here is how I did it:
Rails API database configuration
Heroku doesn’t support the sqlite3 database, so I changed it to PostgreSQL by doing the following:
- Replace gem
'sqlite3'with gem'pg'in your gemfile - Specify your Ruby Version in Gemfile like so: ruby “x.x.x”. Note: when doing this, make sure your terminal is using the same ruby version
- Run
bundle installto update Gemfile and Gemfile.lock file - Update
config/database.yml to use adapter: postgresql. Your file should look something like this:
default: &default
  adapter: postgresql
  pool: <%= ENV.fetch("RAILS_MAX_THREADS") { 5 } %>
  timeout: 5000
  host: localhost
  username: database_username
  password: somepassword   #use an ENV variable
development:
  <<: *default
  adapter: postgresql
  database: your_app_name_development
# Warning: The database defined as "test" will be erased and
# re-generated from your development database when you run "rake".
# Do not set this db to the same as development or production.
test:
  <<: *default

  database: your_app_name_test
production:
  <<: *default
  adapter: postgresql
  database: your_app_name_production
** Deploy!!**
After setting up my database , and installing the Heroku CLI, I created my project on heroku.
heroku login -i           #log into your heroku account
email: blabla@bla.com
password: jmfkenjfli

heroku create 'your_app'     #with this command you can create your project
Now is time to deploy!!
git  add.                #keep your repo in heroku up to date
git commit -m 'initial commit'
git push heroku
Migrate your database, and your seeds (if you have them)
heroku run rake db:migrate
heroku run rake db:seed
To make sure app is running, type heroku open and this will open your app in the browser.
Note: go to the URL that you assigned for your JSON
Make sure to go back to your cors file in configure/initializers/cors.rb and add your frontend URL in the origins
Deploy your frontend with Surge
I love working with Surge! It’s super easy to deploy in it! But before getting ready to deploy, I went to my actions folder and changed every localhost:300 to my heroku project URL to retrieve my database info!
I have use many times before, but if you haven’t you can follow the instructions here.
npm run build
Make sure to go to the build folder and change the index.html to 200.html
Make sure to go back to your cors file (rails api repo) in configure/initializers/cors.rb and add your frontend URL in the origins
Now is deployment time!!
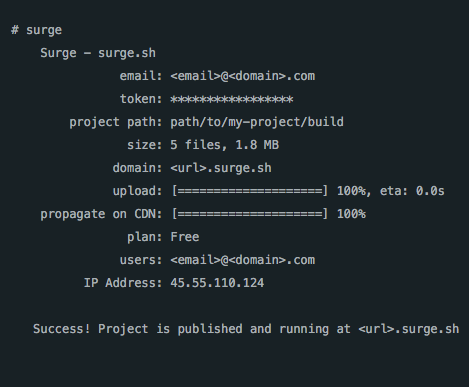
surge // log in and choose your domain name and deploy!!

Now you can visit your frontend URL and make sure that everything is working!!!! You can check out mine here